Create an Image in 5 Minutes
This guide outlines the steps to create AI-generated images using Whatmore AI Studio, from logging in and selecting content type to customizing models, poses, and applying mood boards.
You can create custom images for all your marketing and product display needs. Customize these images to your liking with numerous options, including aspect ratio, clothing, product details, model ethnicity, model selection, and various poses.
By generating images with the AI Studio, you can rapidly generate high-quality visuals made to specific campaigns or audiences—saving time, reducing costs, and enabling greater flexibility in design and iteration. Whether you're promoting a product, running an ad, or updating your website or social media, these tools help you create the right images more quickly and easily.
Use Cases
Quick Catalog Creation for New CollectionsImagine you are an e-commerce manager who just received a new clothing collection. Instead of scheduling a costly photoshoot with multiple models, you can instantly create on-brand catalog images using AI Studio tools. This saves both time and budget, lets you localize imagery for different markets, and speeds up campaign launches.
Creating Seasonal or Festival CampaignsThink about an apparel brand preparing for wedding season collection. Traditionally, you would need to arrange special shoots with elaborate setups, themed decorations, and multiple outfits. With AI Studio, you can generate festive-themed images in minutes—placing your products in cultural or seasonal contexts like family gatherings, street celebrations, or elegant wedding parties. This way, your campaigns feel relevant and engaging without the cost and delay of organizing large-scale photoshoots.
Access the Studio
To access the studio:
-
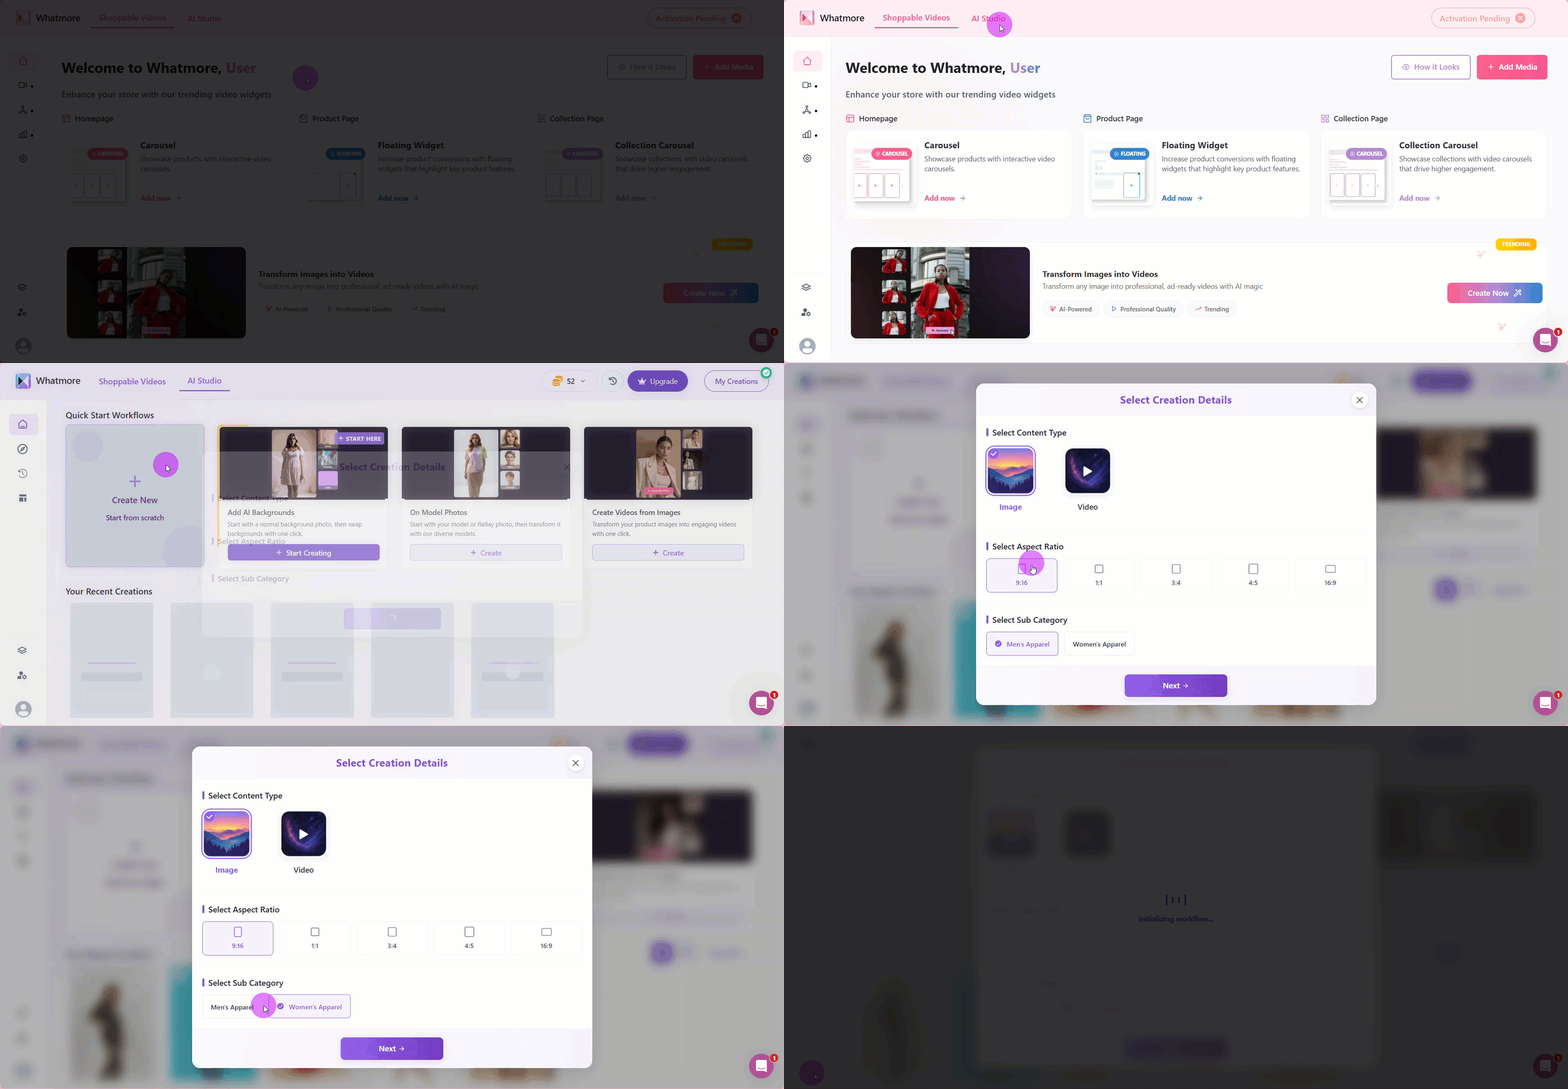
Log in to your Whatmore account and select the AI Studio tab. Ensuring that you are logged into your account allows you to track your projects, use your credits correctly, and access saved models, templates, and configurations.
-
Click Create New to start a new workflow.
-
Select Image under Select Content Type.
-
Select the aspect ratio that best suits your content. Correctly defining the type of content and the proportion ensures compatibility with distribution channels and avoids the need for rework. 1:1 is the ideal ratio for Instagram, for example. Meanwhile, the others are suitable for e-commerce platforms.
-
Select the apparel category of your preference: Men's apparel or Women's apparel.
-
Click Next.
Input Product Details
The next step is to include more product details to generate the image. You will need to provide a reference for your product (this can be a URL of your product or an uploaded image). From this data, AI will be able to understand the visual and contextual characteristics of the product, generating realistic and relevant photos.
- Enter the URL of the product you want to create an image for. Make sure that the URL contains all the visual and textual information about the product (such as color, material, style). This directly influences the quality of the image generated.
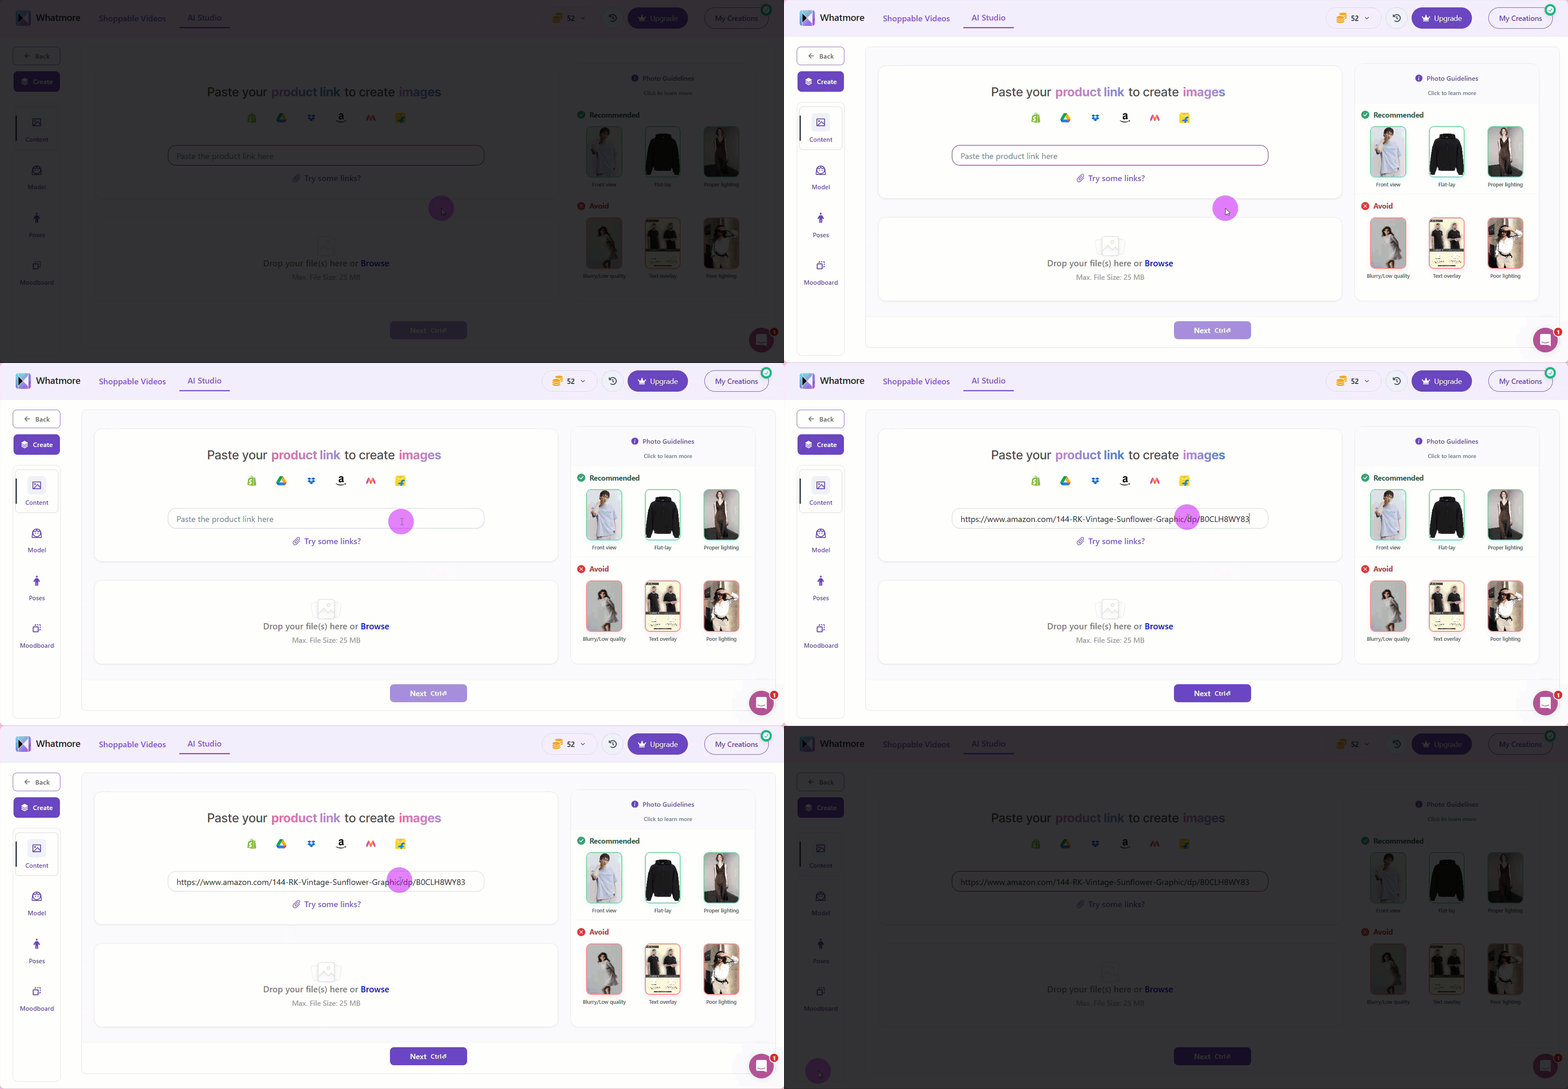
The URL must be from a supported platform: Shopify, Amazon, Flipkart, Myntra, Google Drive, Dropbox.
- Alternatively, you can upload your own product images directly from your computer or from any link.
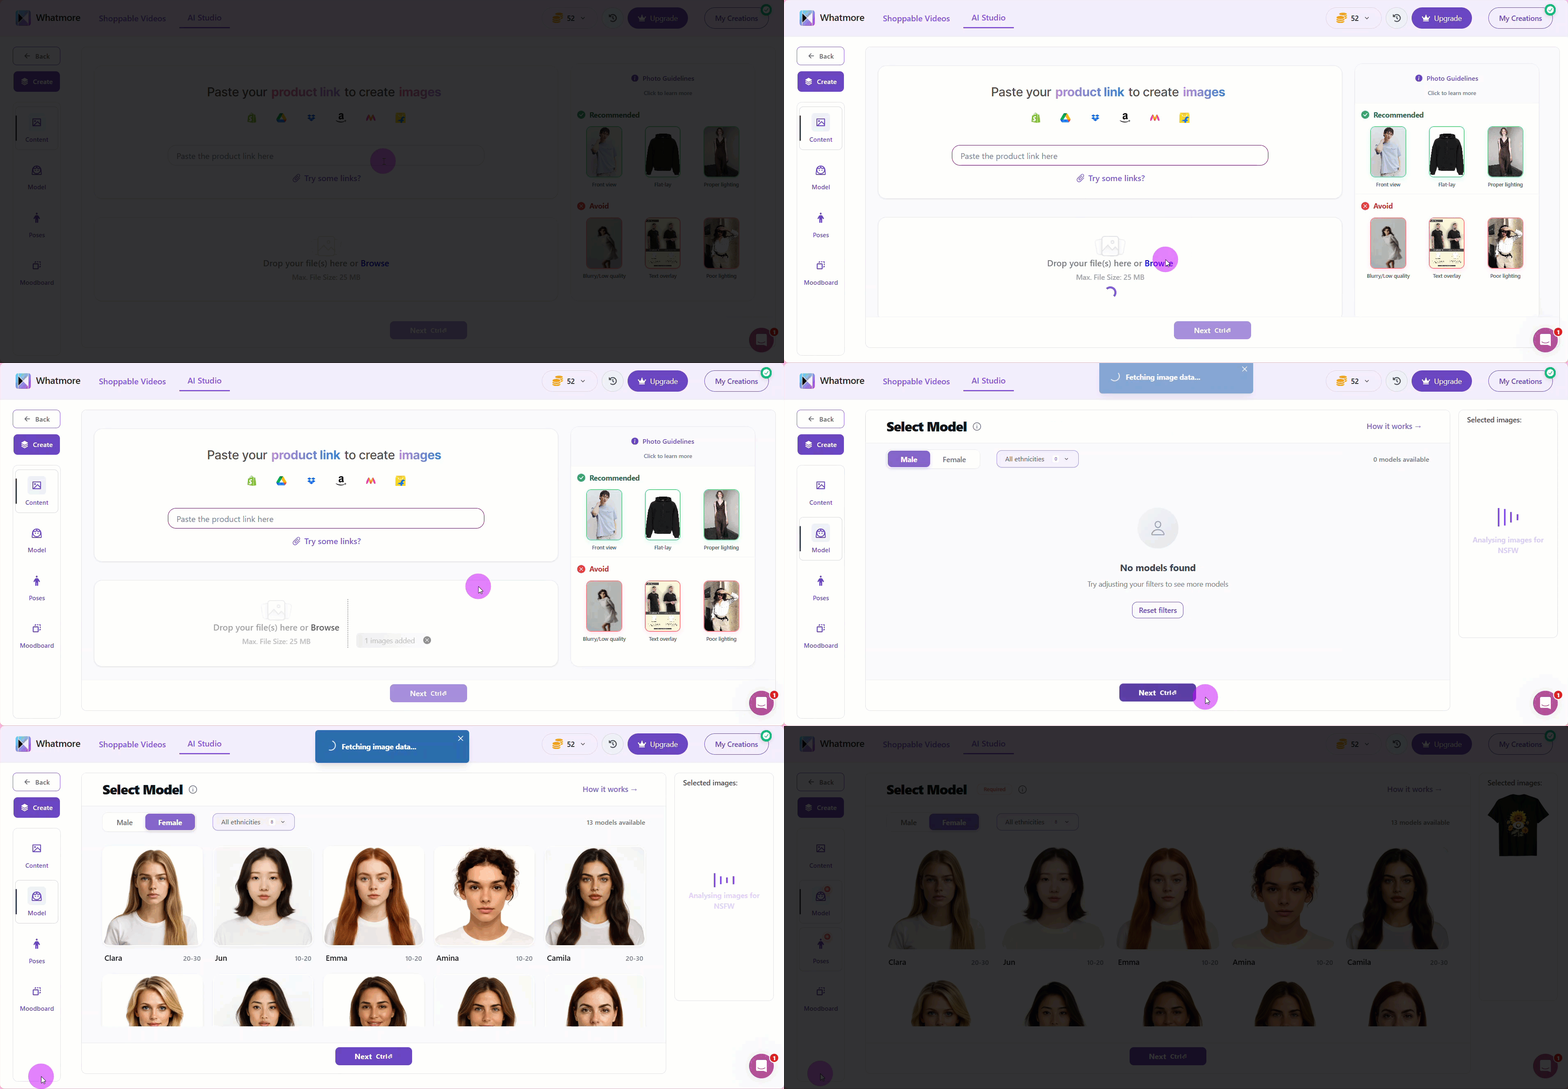
- Then, select Next to upload. Allow some time for the system to process the images.
Customize Your Model
Selecting the right model allows you to represent your target audience better, promoting identification and inclusion. This is vital for fashion and e-commerce campaigns. Using Whatmore IA Studio, you can pick specific details, including the gender, different ethnicities
Using different models is also ideal for A/B audience segmentation tests or when the brand has specific visual representation guidelines.
To customize your model:
-
Select the desired ethnicity.
-
Choose a specific model face.
-
Click Next.
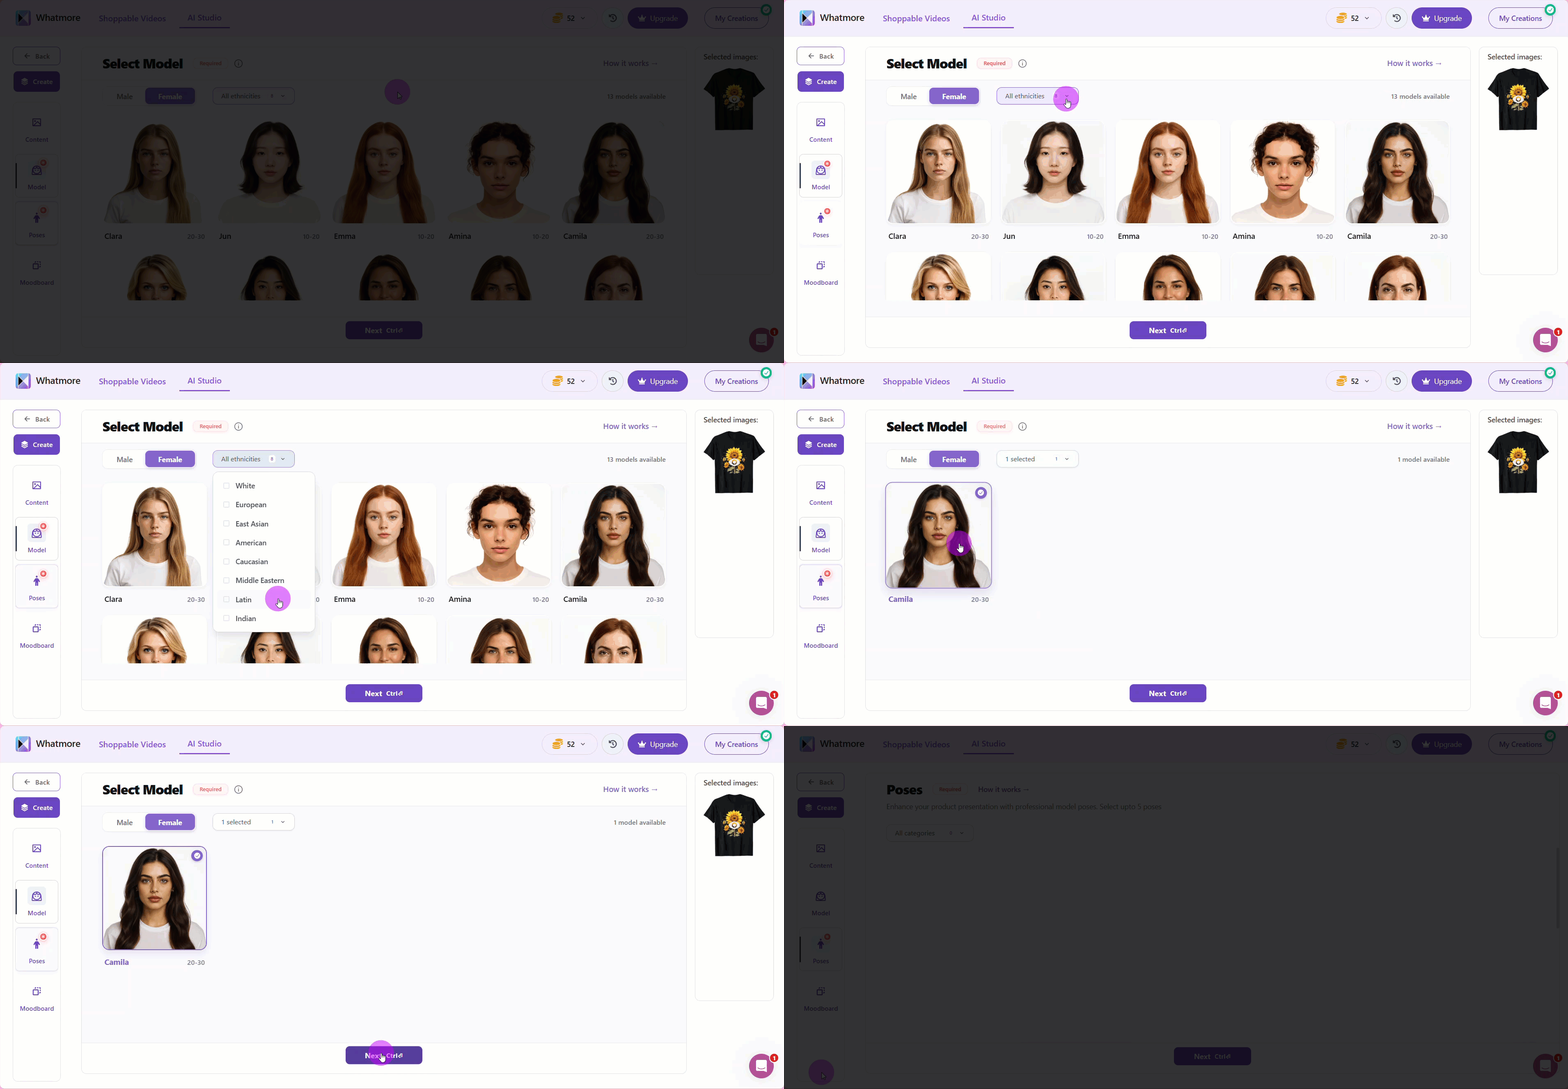
Below each model, you’ll see an age range that represents the demographic the model is designed to reflect. This helps you select models that best match your target audience, ensuring your content feels relatable and authentic. For example, if you’re promoting activewear for young adults, you might choose a model in the 18–25 range, while for professional attire, a 30–40 range might be more effective. Selecting the right age group strengthens the connection between your product and the audience you want to reach.
Select Poses
The way your model stands, moves, or gestures in the pictures plays a big role in how people connect with the product. A confident, natural pose can make the clothing look attractive, while an awkward or mismatched pose can make the product feel less appealing. Think of it like a shop window; the way the mannequin is positioned decides whether customers stop to look or keep walking.
When selecting poses in AI Studio, you don’t need to worry about technical terms. Simply imagine how you would like your customer to see the product: should it look casual, formal, playful, or professional? The system provides you with ready-made pose options to match these needs.
Here’s how to do it step by step:
-
Click on All categories to filter positions. Here you will find categories such as:
-
Athleisure – relaxed and sporty, perfect for gym or yoga wear.
-
Casual Wear – simple and everyday poses, like someone walking down the street.
-
Formal Wear – elegant and composed, suited for office or business attire.
-
Partywear – dynamic poses with energy, suitable for festive or celebratory outfits.
-
Streetwear – trendy and expressive, giving a fashionable urban look.
-
Swimwear – comfortable, open poses suitable for beach or pool settings.
-
-
Tick Keep Input Poses if you uploaded your own product image and already like the pose shown. This keeps the pose as it is, but allows the AI to modify the model.
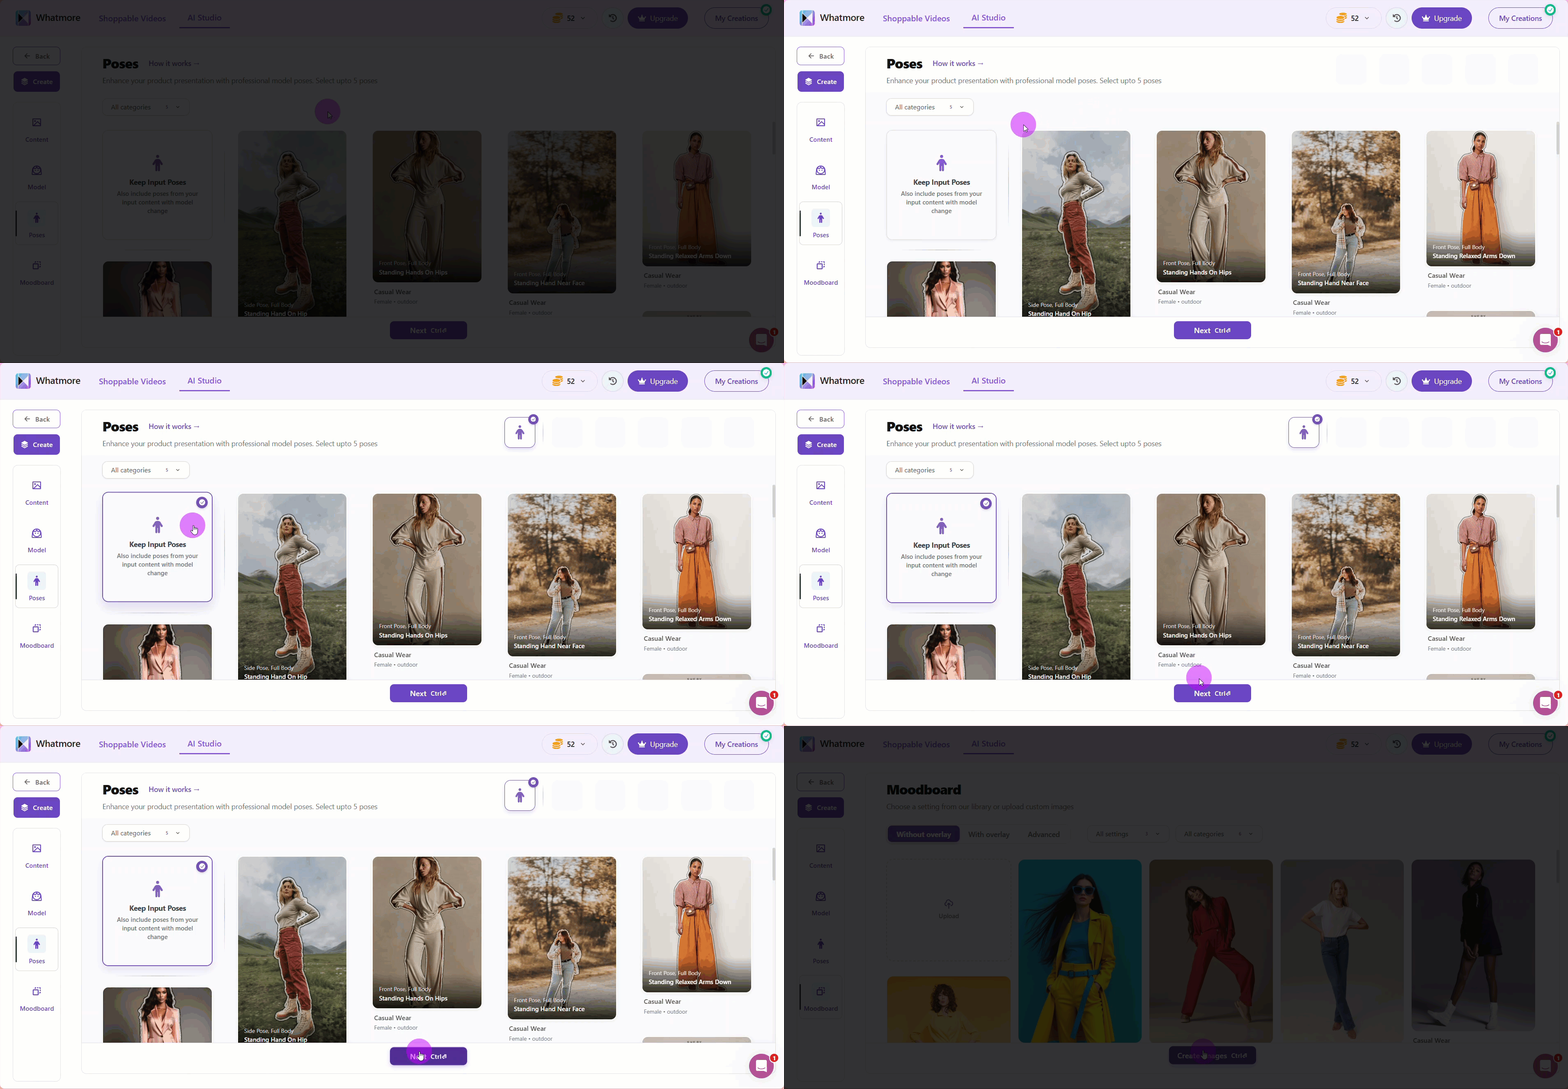
3. Select multiple poses or one single pose. This variety gives you more choices when creating your campaign. You can select up to five poses. For example, if you are selling a shirt, you might choose:
-
A front-facing pose (to clearly show design details)
-
A side pose (to display the fit)
-
A walking pose (to make the clothing look natural in motion)
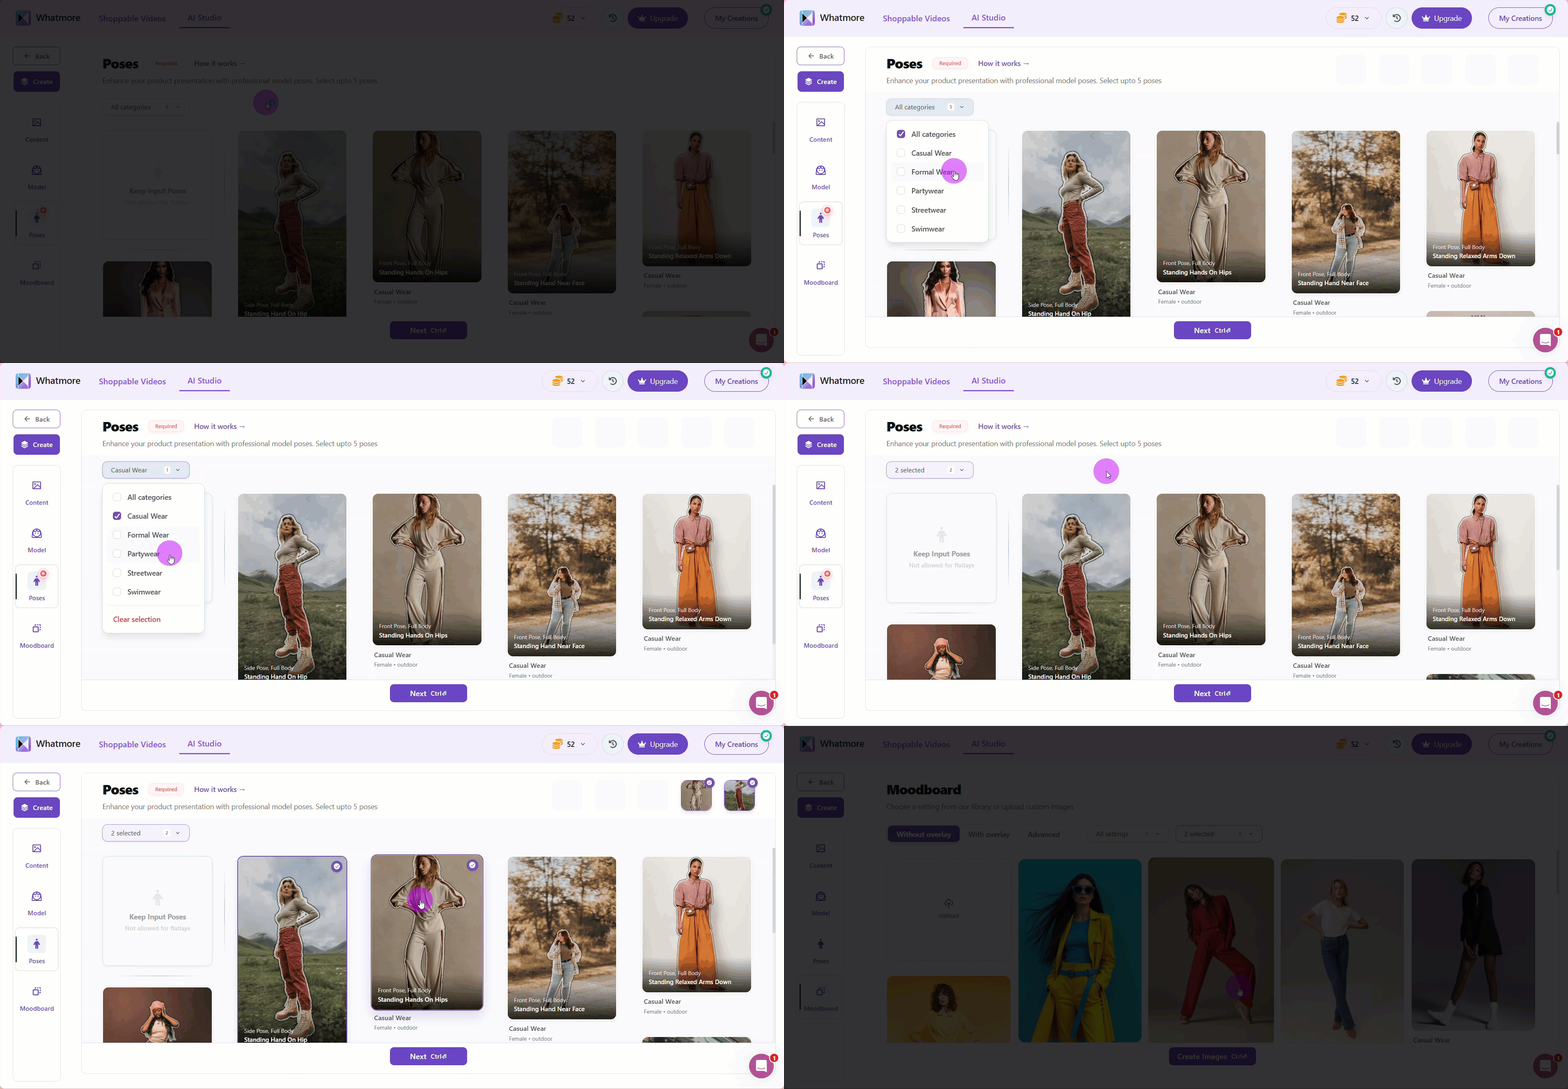
The total number of images generated will be the sum of your input images plus the poses you select. For example, 3 input images + 5 selected poses = 8 outputs. This affects credit usage.
4. After choosing your pose, click Next. The AI will generate these poses with your chosen model, so you can see how your product looks in different positions before finalizing.
When in doubt, choose at least one neutral standing pose. This ensures that even if other poses don’t align with your vision, you’ll always have a clean, professional option to use in catalogs or advertisements.
Note that sometimes an image may be invalid (e.g., the model’s face is obscured by a hat, cap, or glasses). You may still be charged credits for these images, so double-check your selections.
Apply a Mood Board
The mood board defines the visual environment, allowing the product to be contextualized (e.g. in a street look, studio, beach, etc.). This improves engagement with the public and the perception of the product's value.
We recommend reviewing your brand manual and color palette before applying the mood board.
To apply a mood board:
-
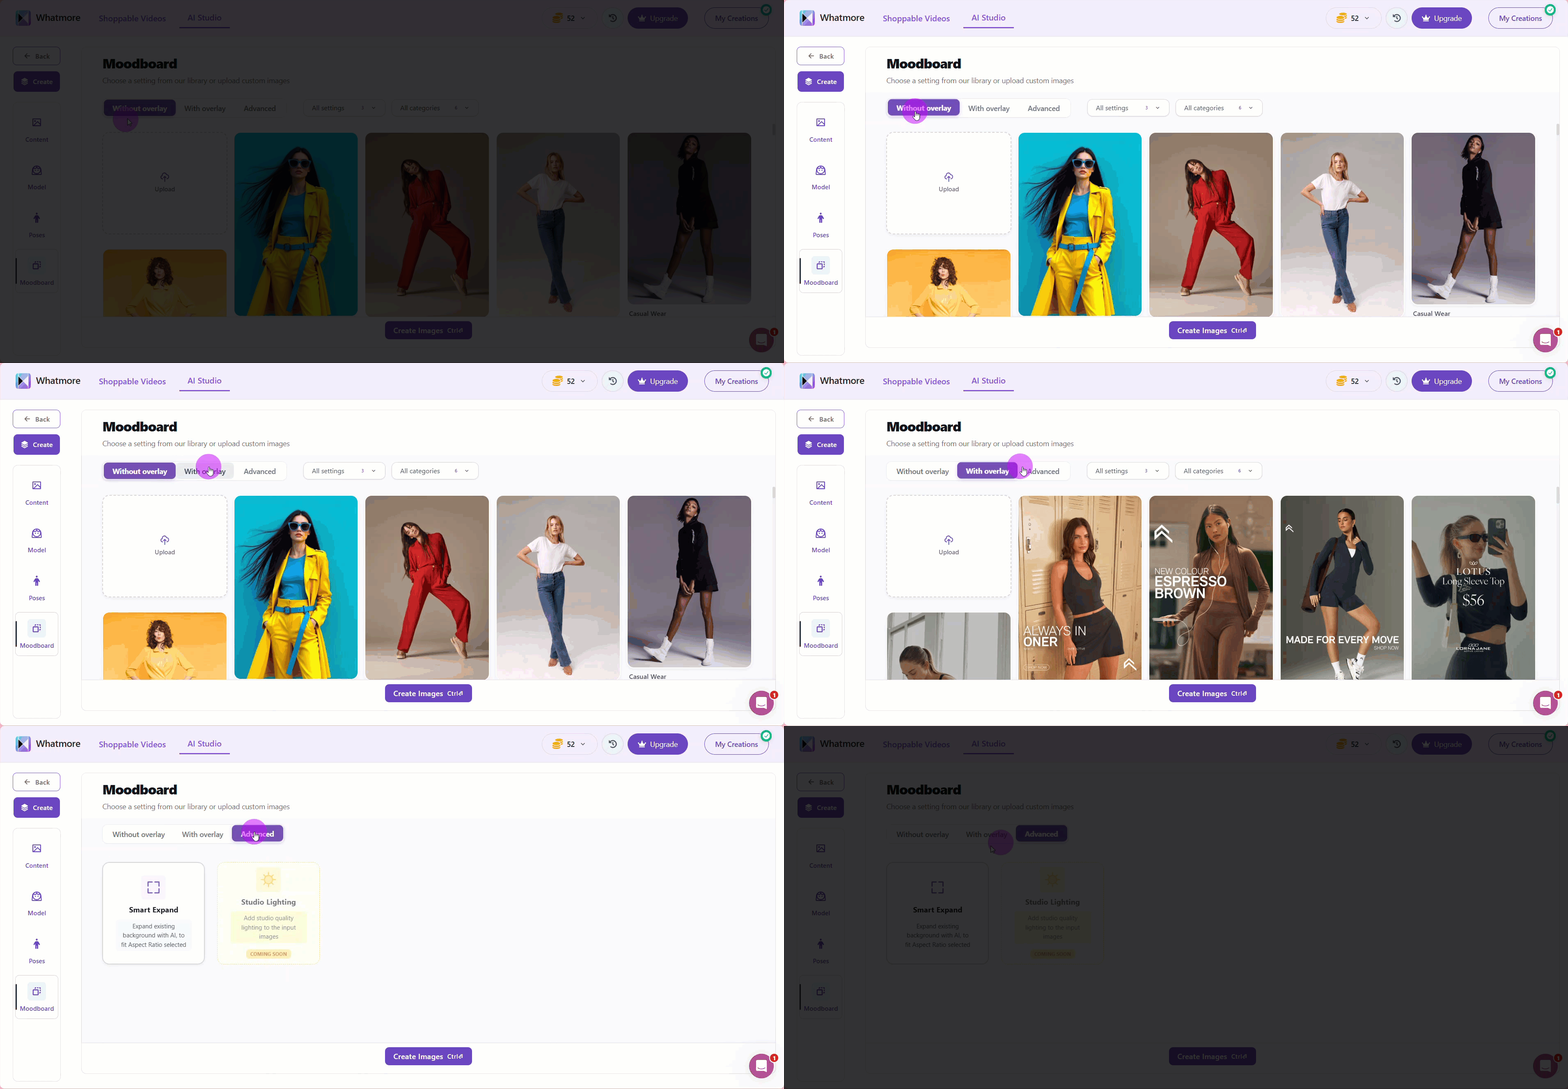
Choose whether you want the background to be:
-
With overlay: If you select this option, you can choose to create an overlay for marketing purposes (e.g., displaying price or address on the image). The AI system will fetch content from your product link to make the overlay.
-
Without overlay: If you select this option, there will be no overlay over the picture.
-
Advanced: Use this option if you want to use advanced tools, such as Smart Expand. It allows you to expand the background in a picture.
-
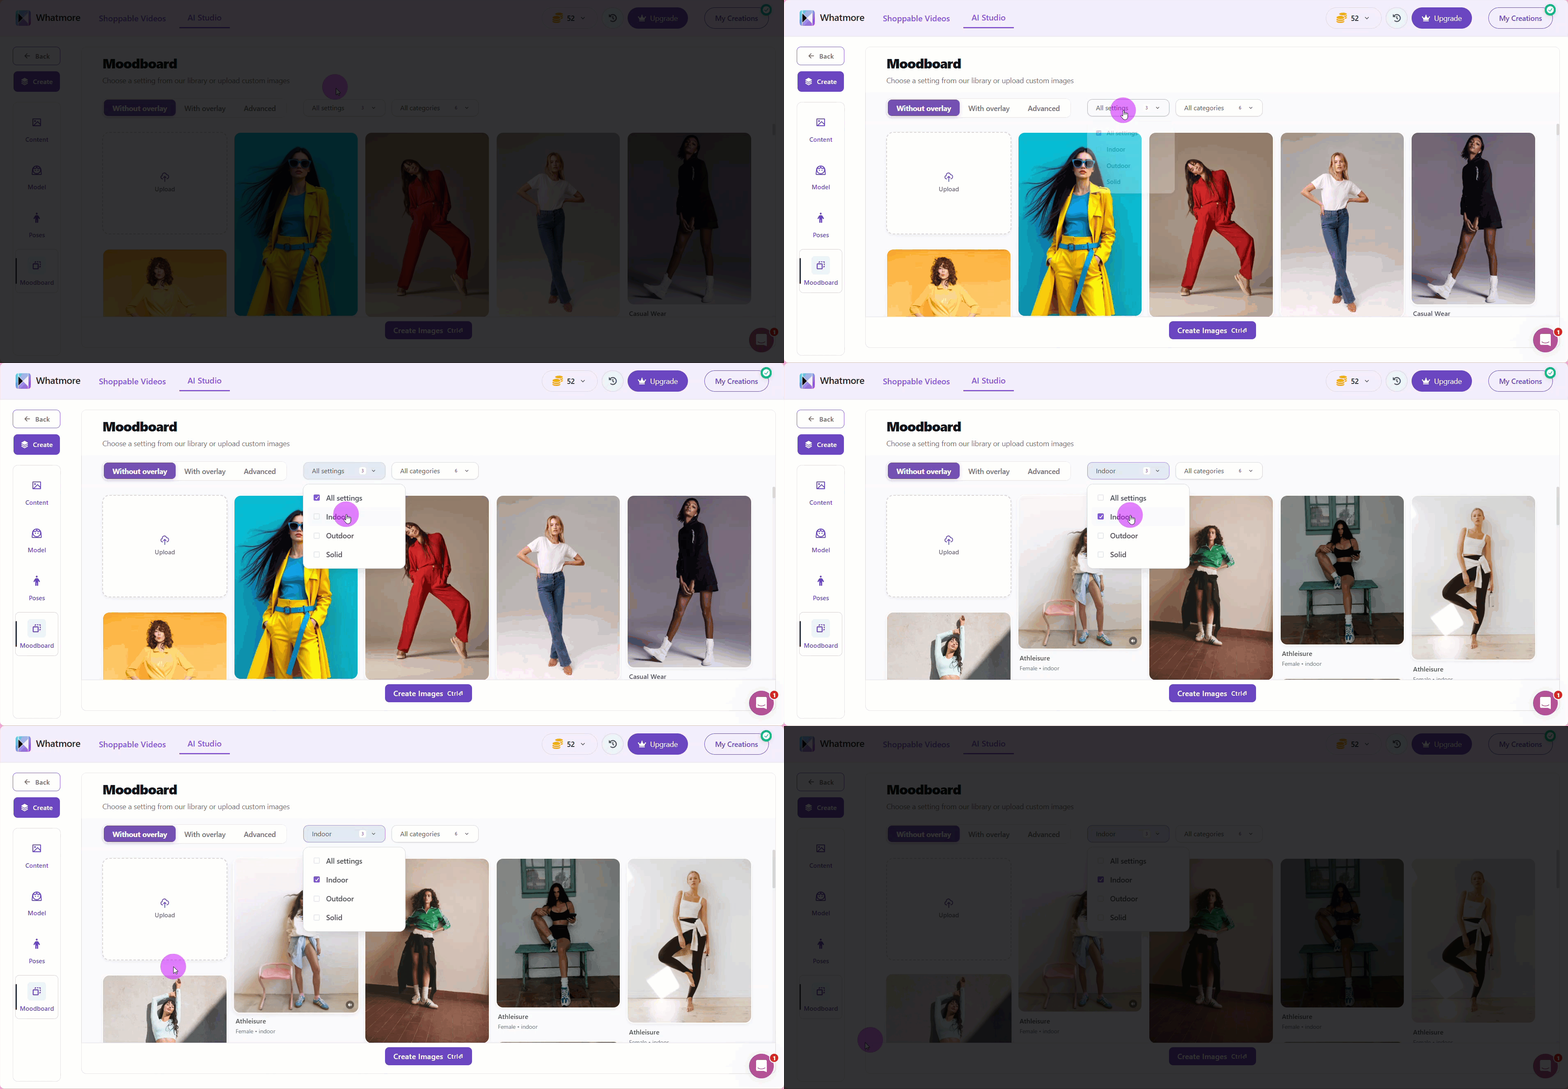
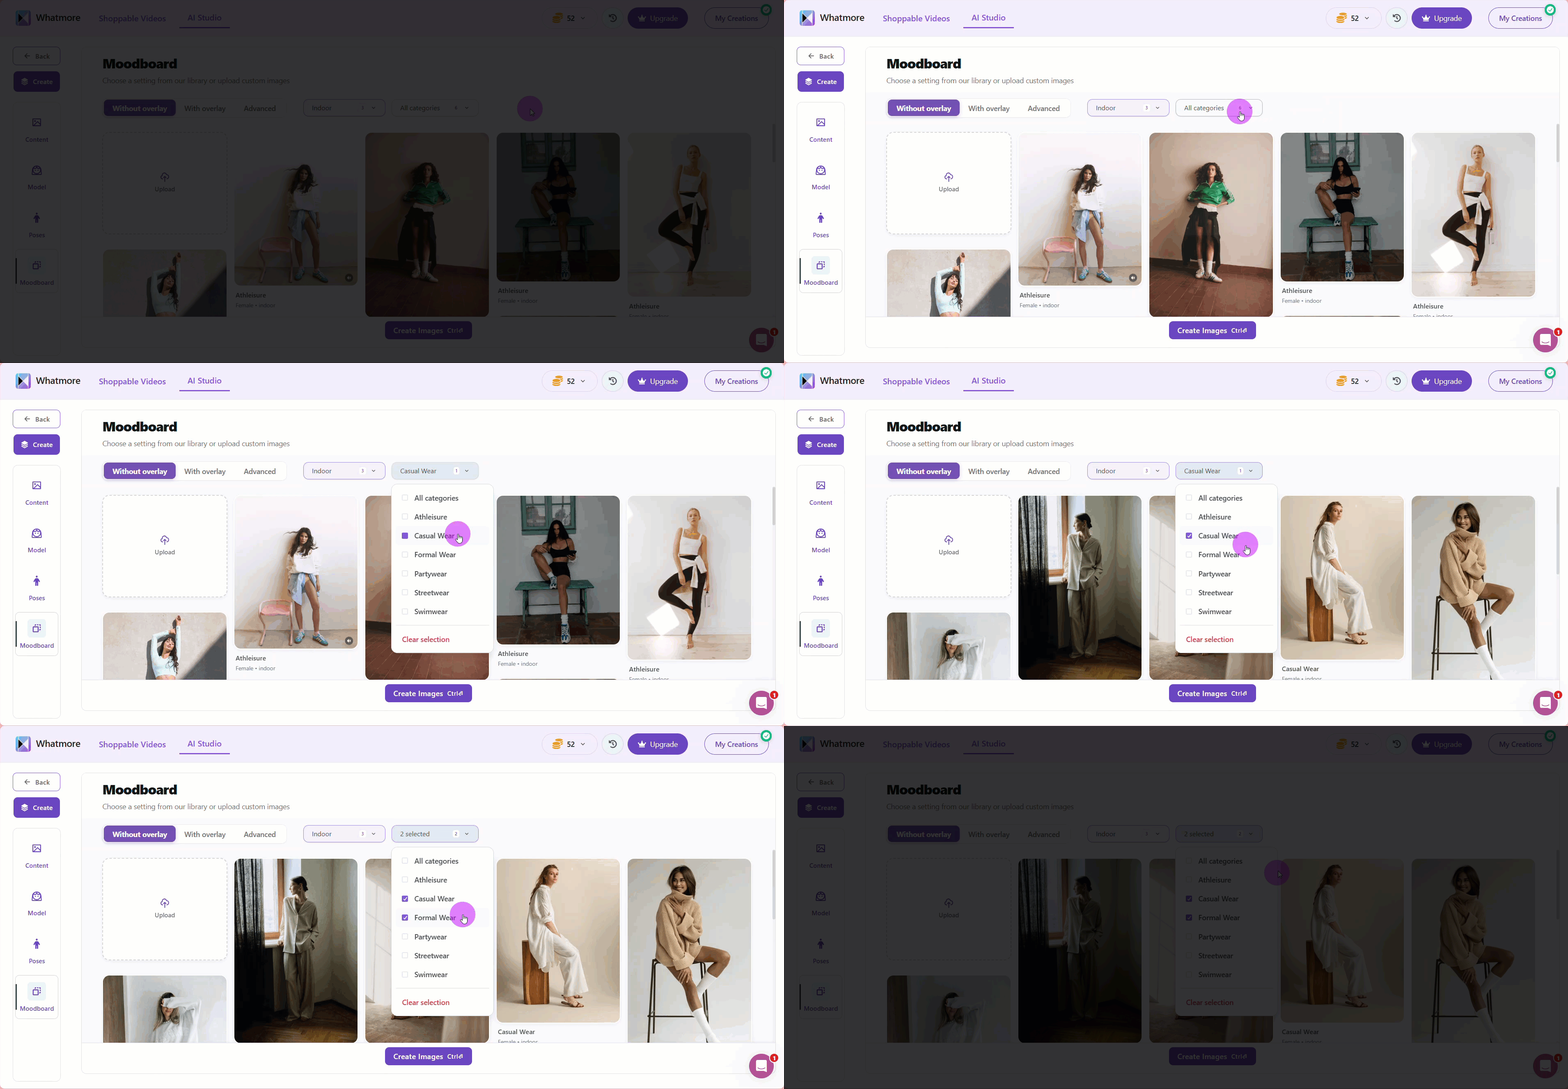
- Filter backgrounds by indoor, outdoor or solid settings.
- Filter the type of wear in All categories.
-
Select the image you want after filtering the results.
-
Select Create Images to move forward.
-
Click Submit and select a name for your template. It will display the total number of credits that will be consumed for this run.
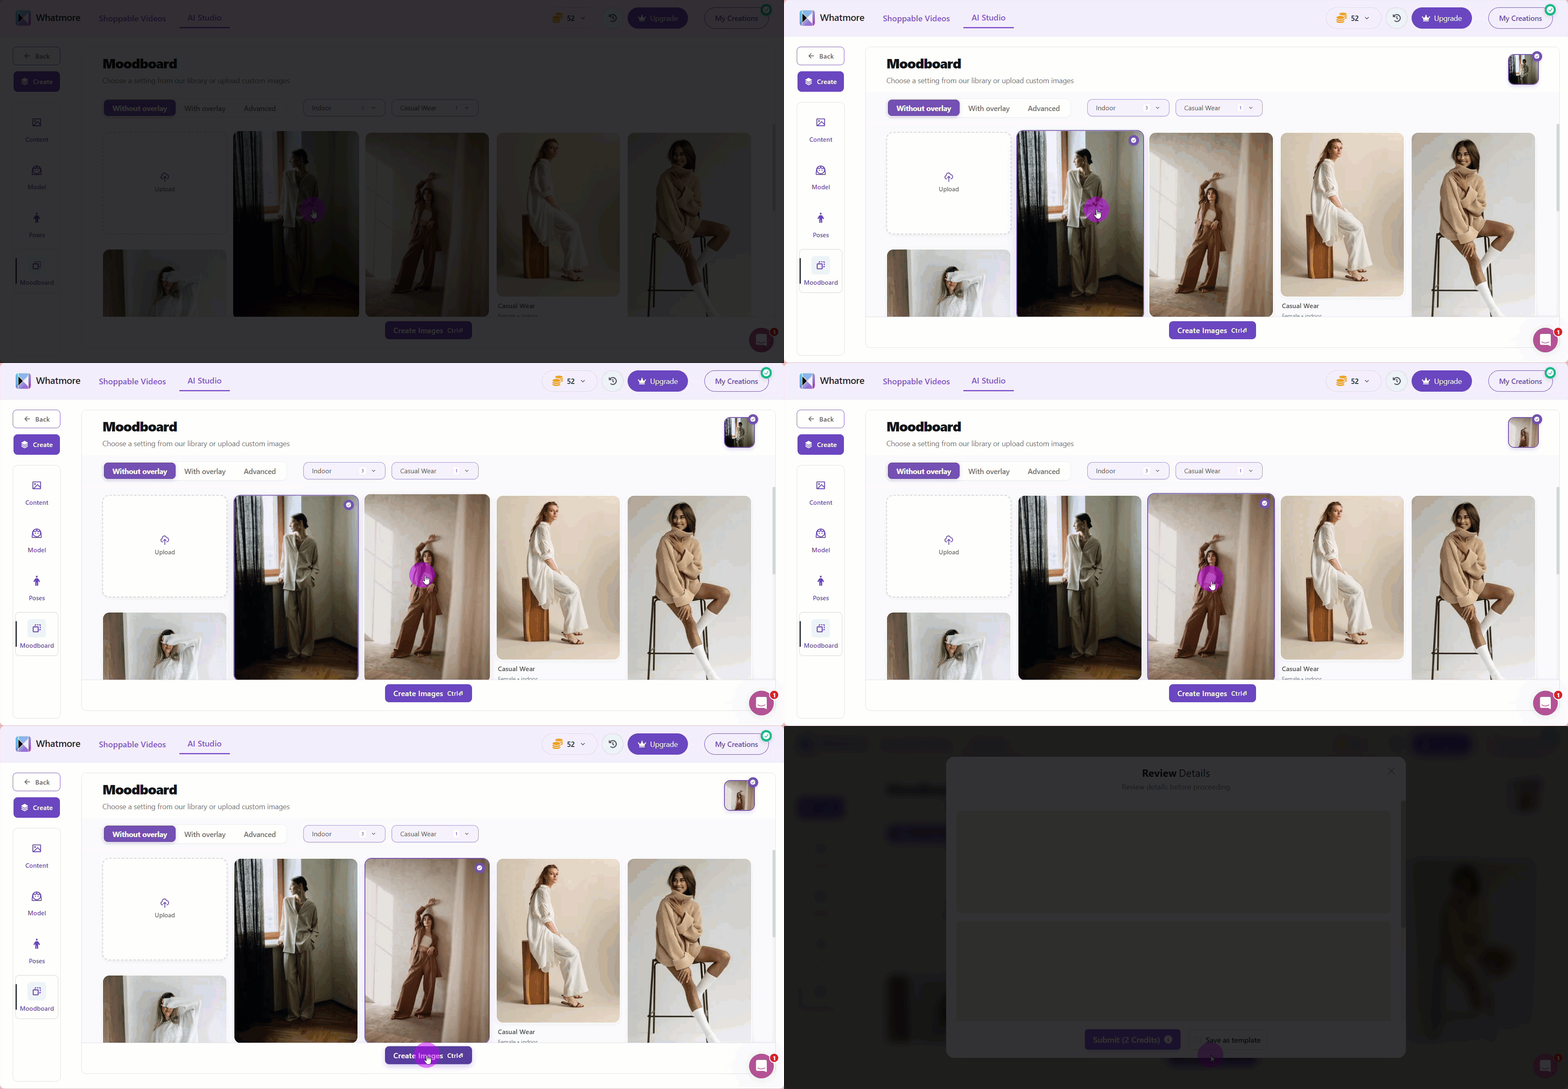
Review Details
Reviewing your creation helps avoid unnecessary credit usage and ensures visual consistency. We recommend saving your creations as templates to speed up future projects.
To review details:
-
Click on the images to view them in the gallery.
-
Select the red X button in each image if you wish to delete it.
-
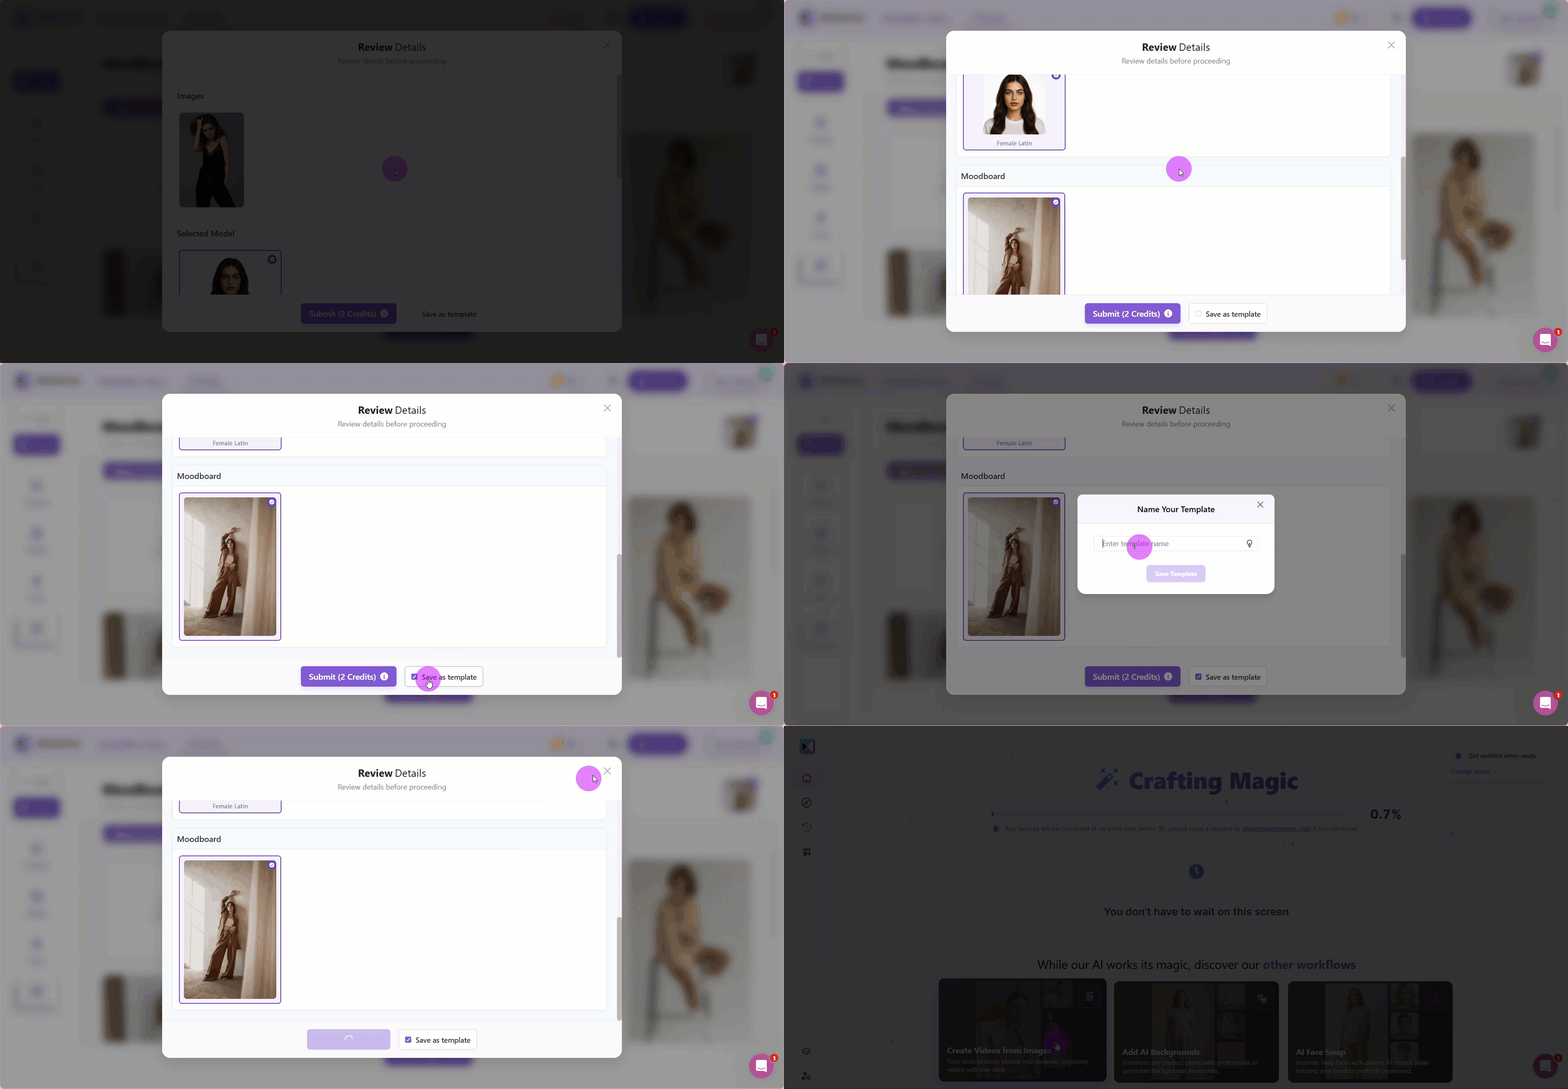
Review the selected model and moodboard. If you wish to change them, go back to the prior steps.
-
Tick the Save as template option if you want to save your current setup as a template for future use.
-
Select the Submit button to continue. It will display the total number of credits that will be consumed for this run.
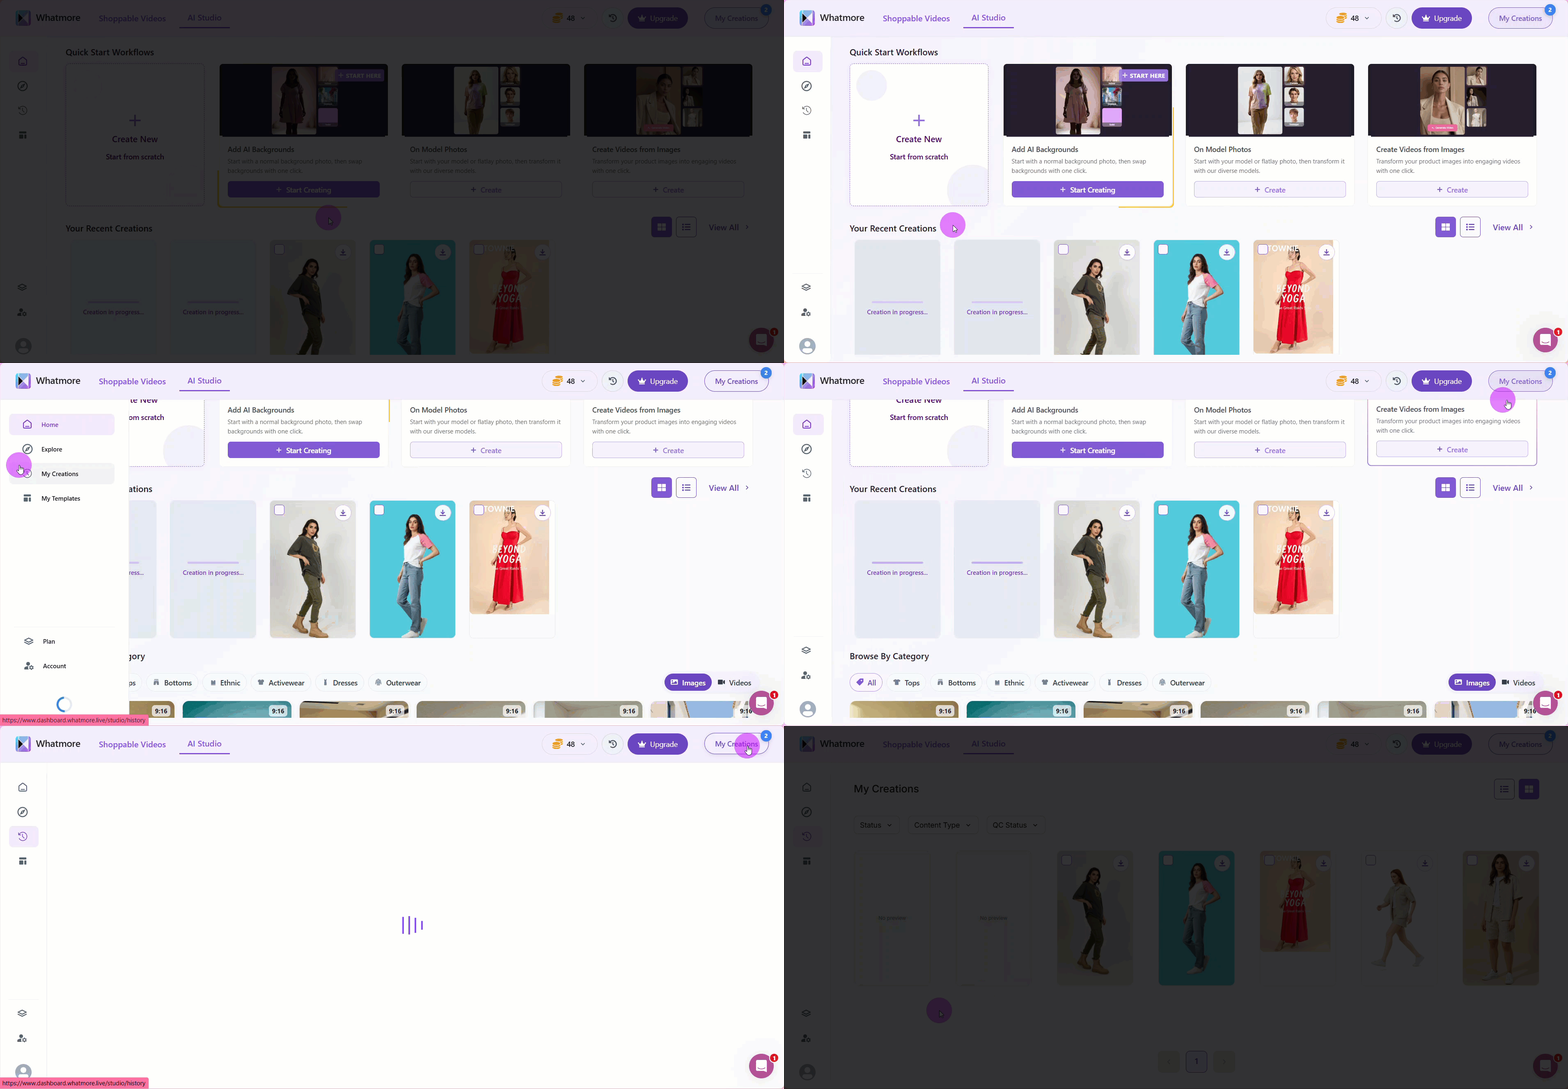
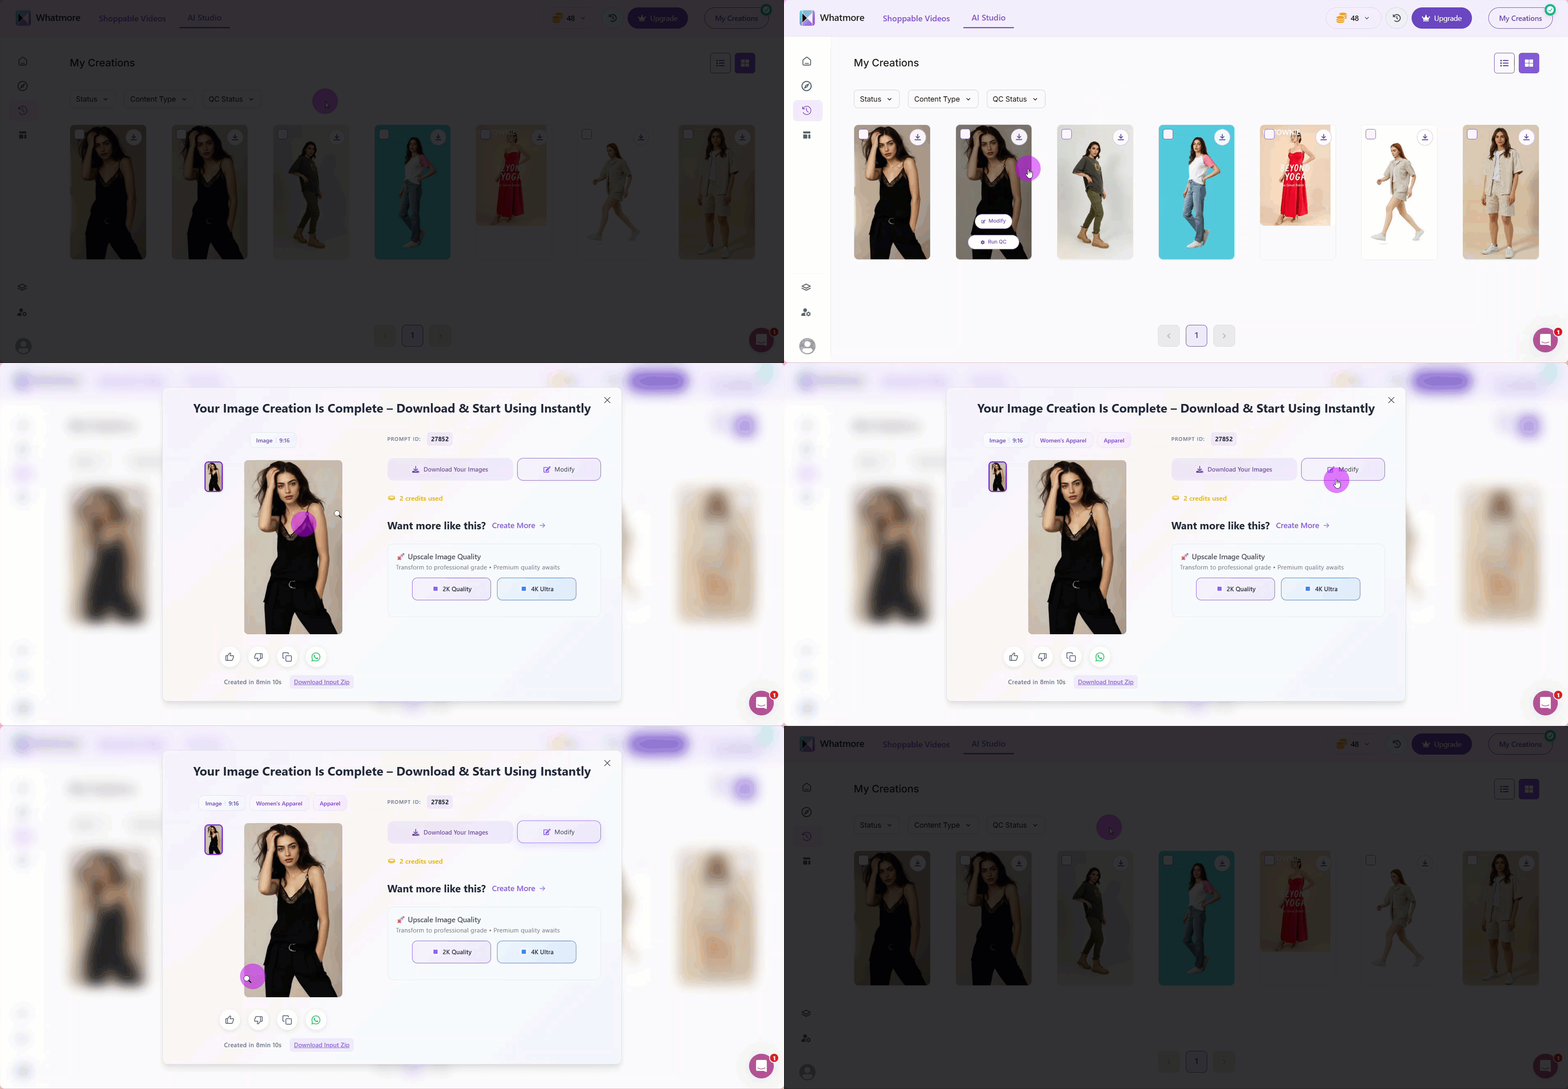
Your images have been created! You can view them in the My Creations section from the left menu or in the main section.
You will have personalized, professional images ready for publication on marketing channels, catalogs, or social networks. Consider integrating this process with your marketing automation tools to distribute the images you create efficiently.
Any issues will be fixed at no extra cost within 3 hours after creating your creative. If the problem isn’t resolved, please submit a request to shyam@whatmore.club.
See Also
To complement your understanding, view the following pages: